Recycler operations, one feature at a time
Order list controls · Summary Order · Create Order · Materials · Receiving list sorting
Order list controls · Summary Order · Create Order · Materials · Receiving list sorting
Five updated areas of the Recycler module. Each chapter pairs the rules you need to know with a short screen recording of the real workflow.
Filter conditions, column settings, and list operations.
Use Pallet ID as a grouping and sort-priority field.
Complete reference, transport, seal, and receiving-task date details in Basic Info.
Category tree structure and disabling materials safely.
Choose the list order that helps the receiving team find records faster.
Order statuses that were previously spread across tabs are now managed in the filter. Use Column settings to control which data appears in the list.
Open the filter area above the list, select the statuses and other conditions you need, then select Apply. Additional conditions return a narrower result set.
Use the column settings icon at the top right of the list to show or hide fields and drag them into the order you want.
Recycler remembers the selected filters for each order-list tab, so you can return to the same working view.
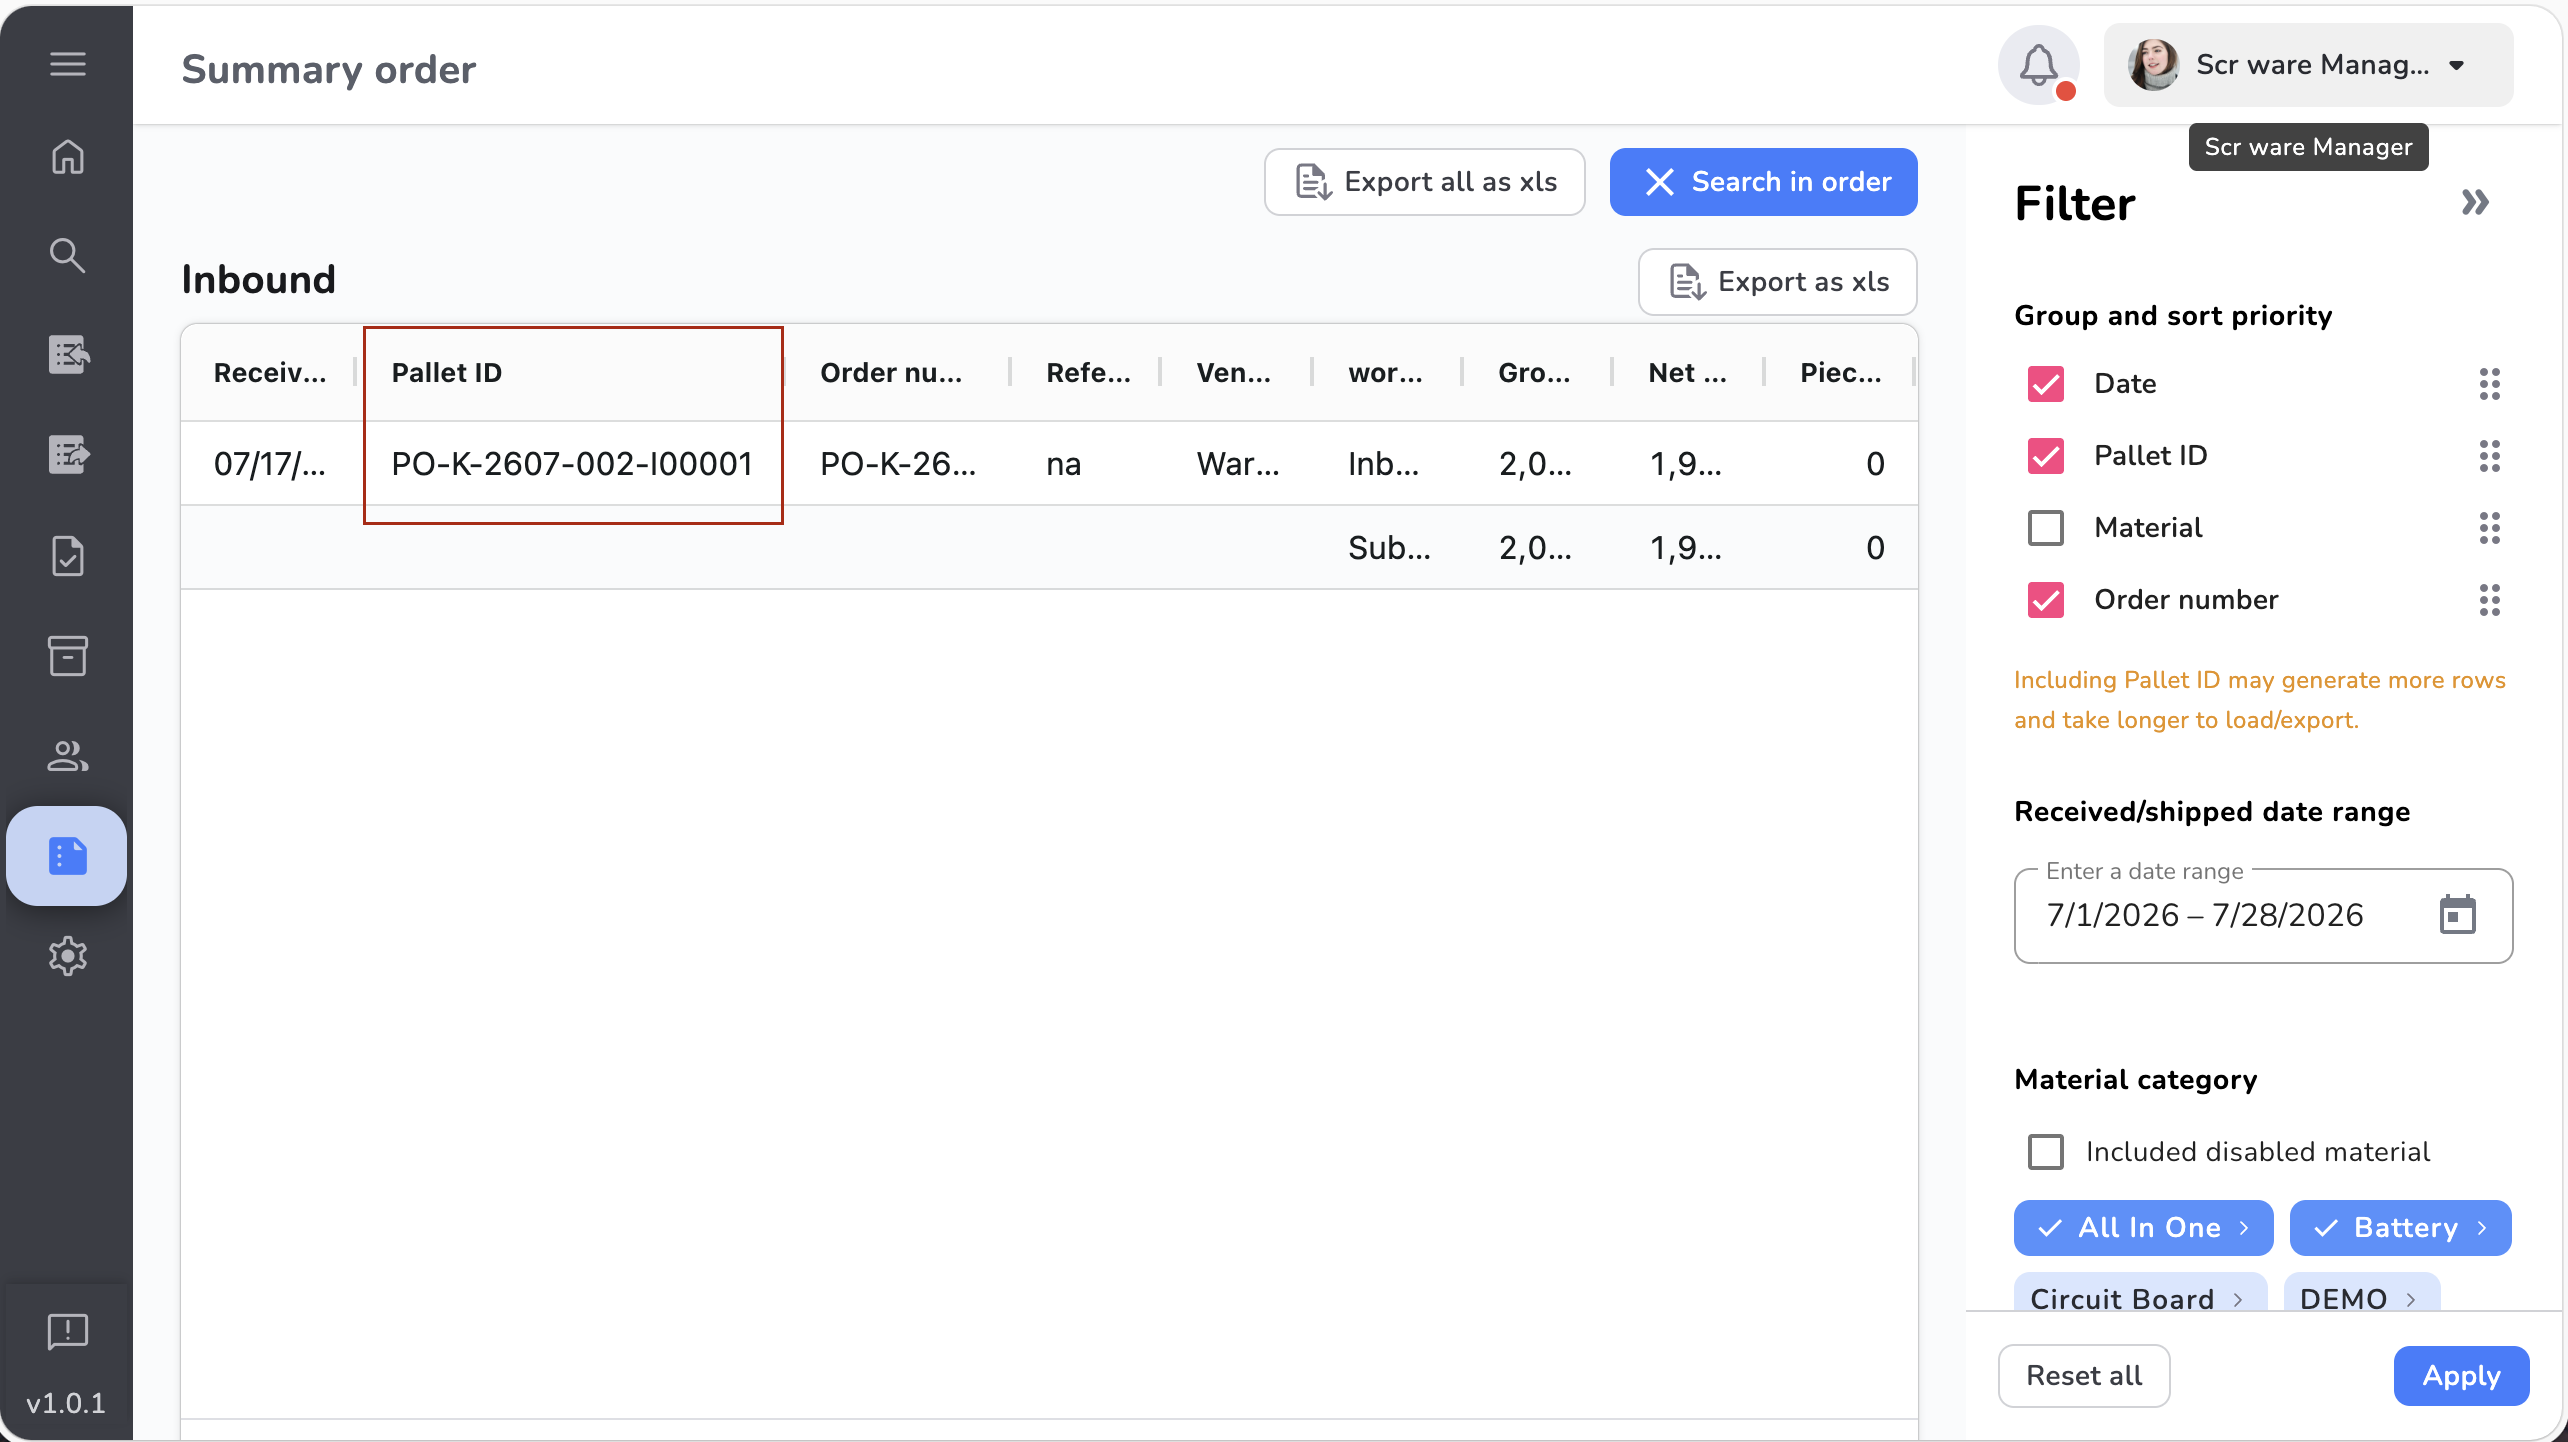
Pallet ID is now available as a grouping and sort-priority field in Summary Order, so results can be separated by pallet when needed.
In Filter, select Pallet ID under Group and sort priority.
Drag the selected fields to set the grouping and sort order that best fits the review.
Including Pallet ID can create more result rows and may take longer to load or export.
Reference Number, Track/Container Number, Seal Number, and the receiving-task date are now collected in Basic Info. Complete the order details in one page before moving to the next step.
In Basic Info, enter the Reference Number, Track/Container Number, and Seal Number together with the other required order details.
Set the receiving-task date in the same Basic Info step, so the order includes the information needed for the receiving schedule.
The receiving-worker page has also been updated. The related number information is now shown in the worker's own work interface, so the team can continue the task with the same order context.
Use the category tree for structure. Disable a material when it should no longer appear in new-entry selections without deleting historical records.
Organize materials under parent categories and sub-categories for more consistent choices across order, receiving, inventory, and reporting.
Set unused materials to Disabled first. Existing inventory and historical records remain available while you clear remaining stock before deletion.
In Summary Order, select Included disabled material when you need reports or exports that include disabled materials.
Under Usability, choose Inbound, Processing, and Outbound. A material is available only in workflows that are enabled for it.
Controls order setup, receiving, and classify selections. When enabled, the material can be received and labeled.
Controls processing and baling selections. When disabled, the material cannot be found, selected, or submitted for those actions.
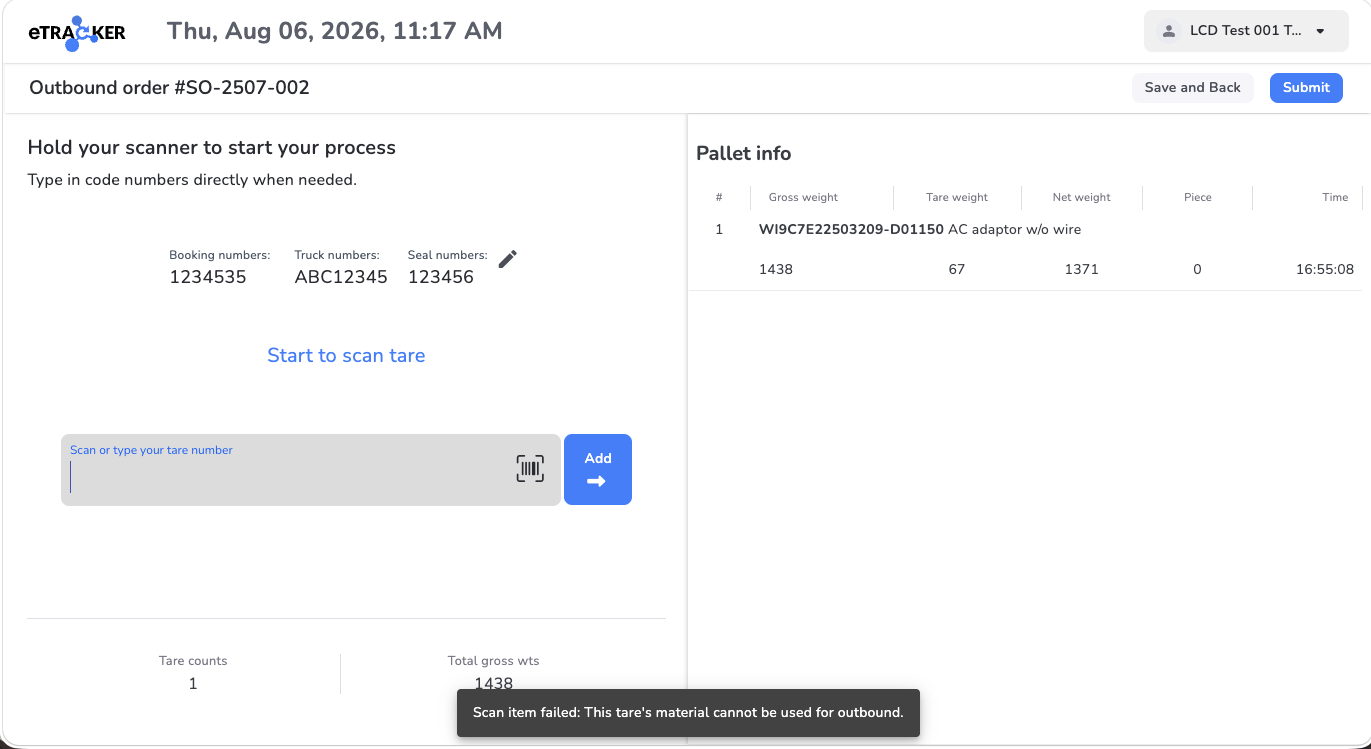
Controls whether inventory can be shipped. Existing labels and inventory do not override this setting.
With Inbound enabled and Outbound disabled, users can receive and print labels. Shipping is still blocked because Outbound is not enabled.
Receiving records, labels, and inventory remain. From that point forward, users cannot find, select, or submit this material in processing or baling.
When Inbound is turned off, the material no longer appears in affected material searches. Existing pallet records remain visible; only the next inbound action is restricted.
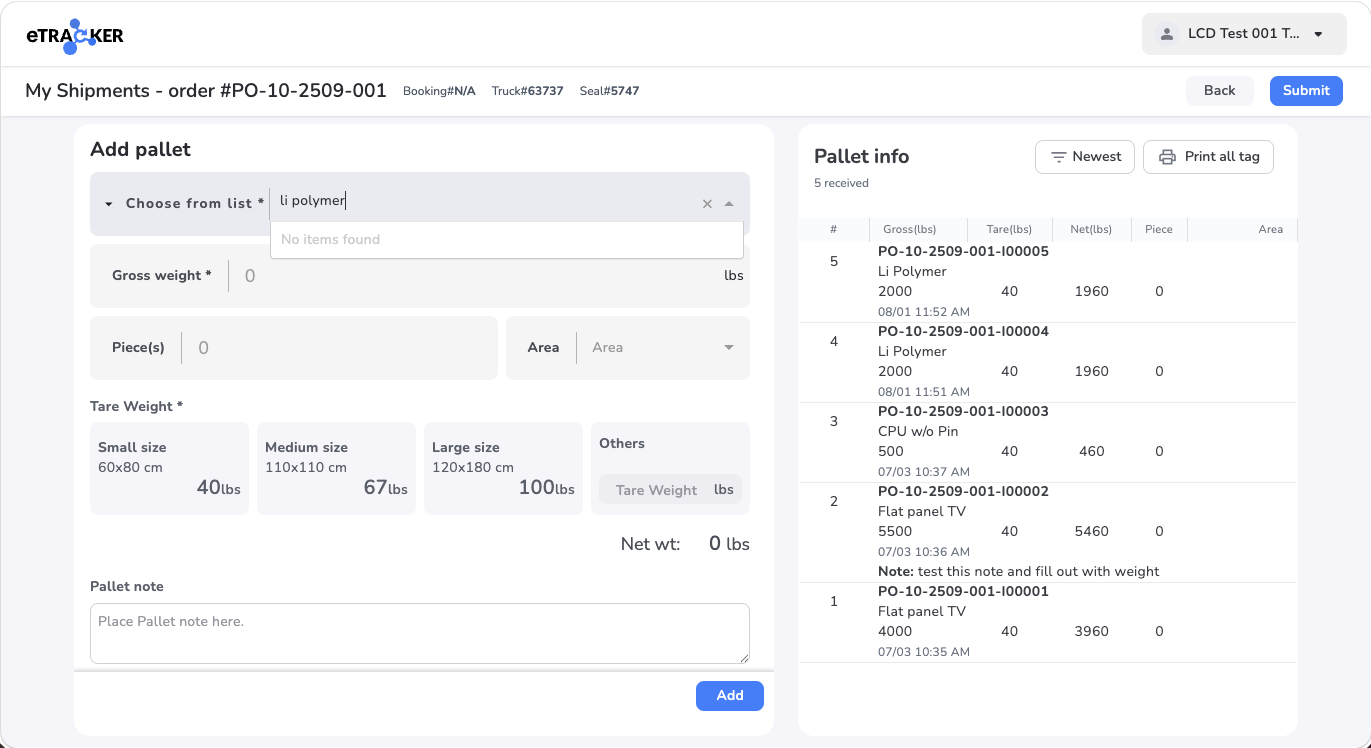
Use this when the material is still active but should be available only at selected workflow stages. For example, keep Inbound on and Outbound off when it can be received and labelled but must not be shipped.
Use this when the material should no longer be selected for any supported new work. Existing inventory, pallets, labels, completed orders, and history remain available for review.
Use Usability to control one workflow stage. Use Disabled to retire a material from supported new selections.
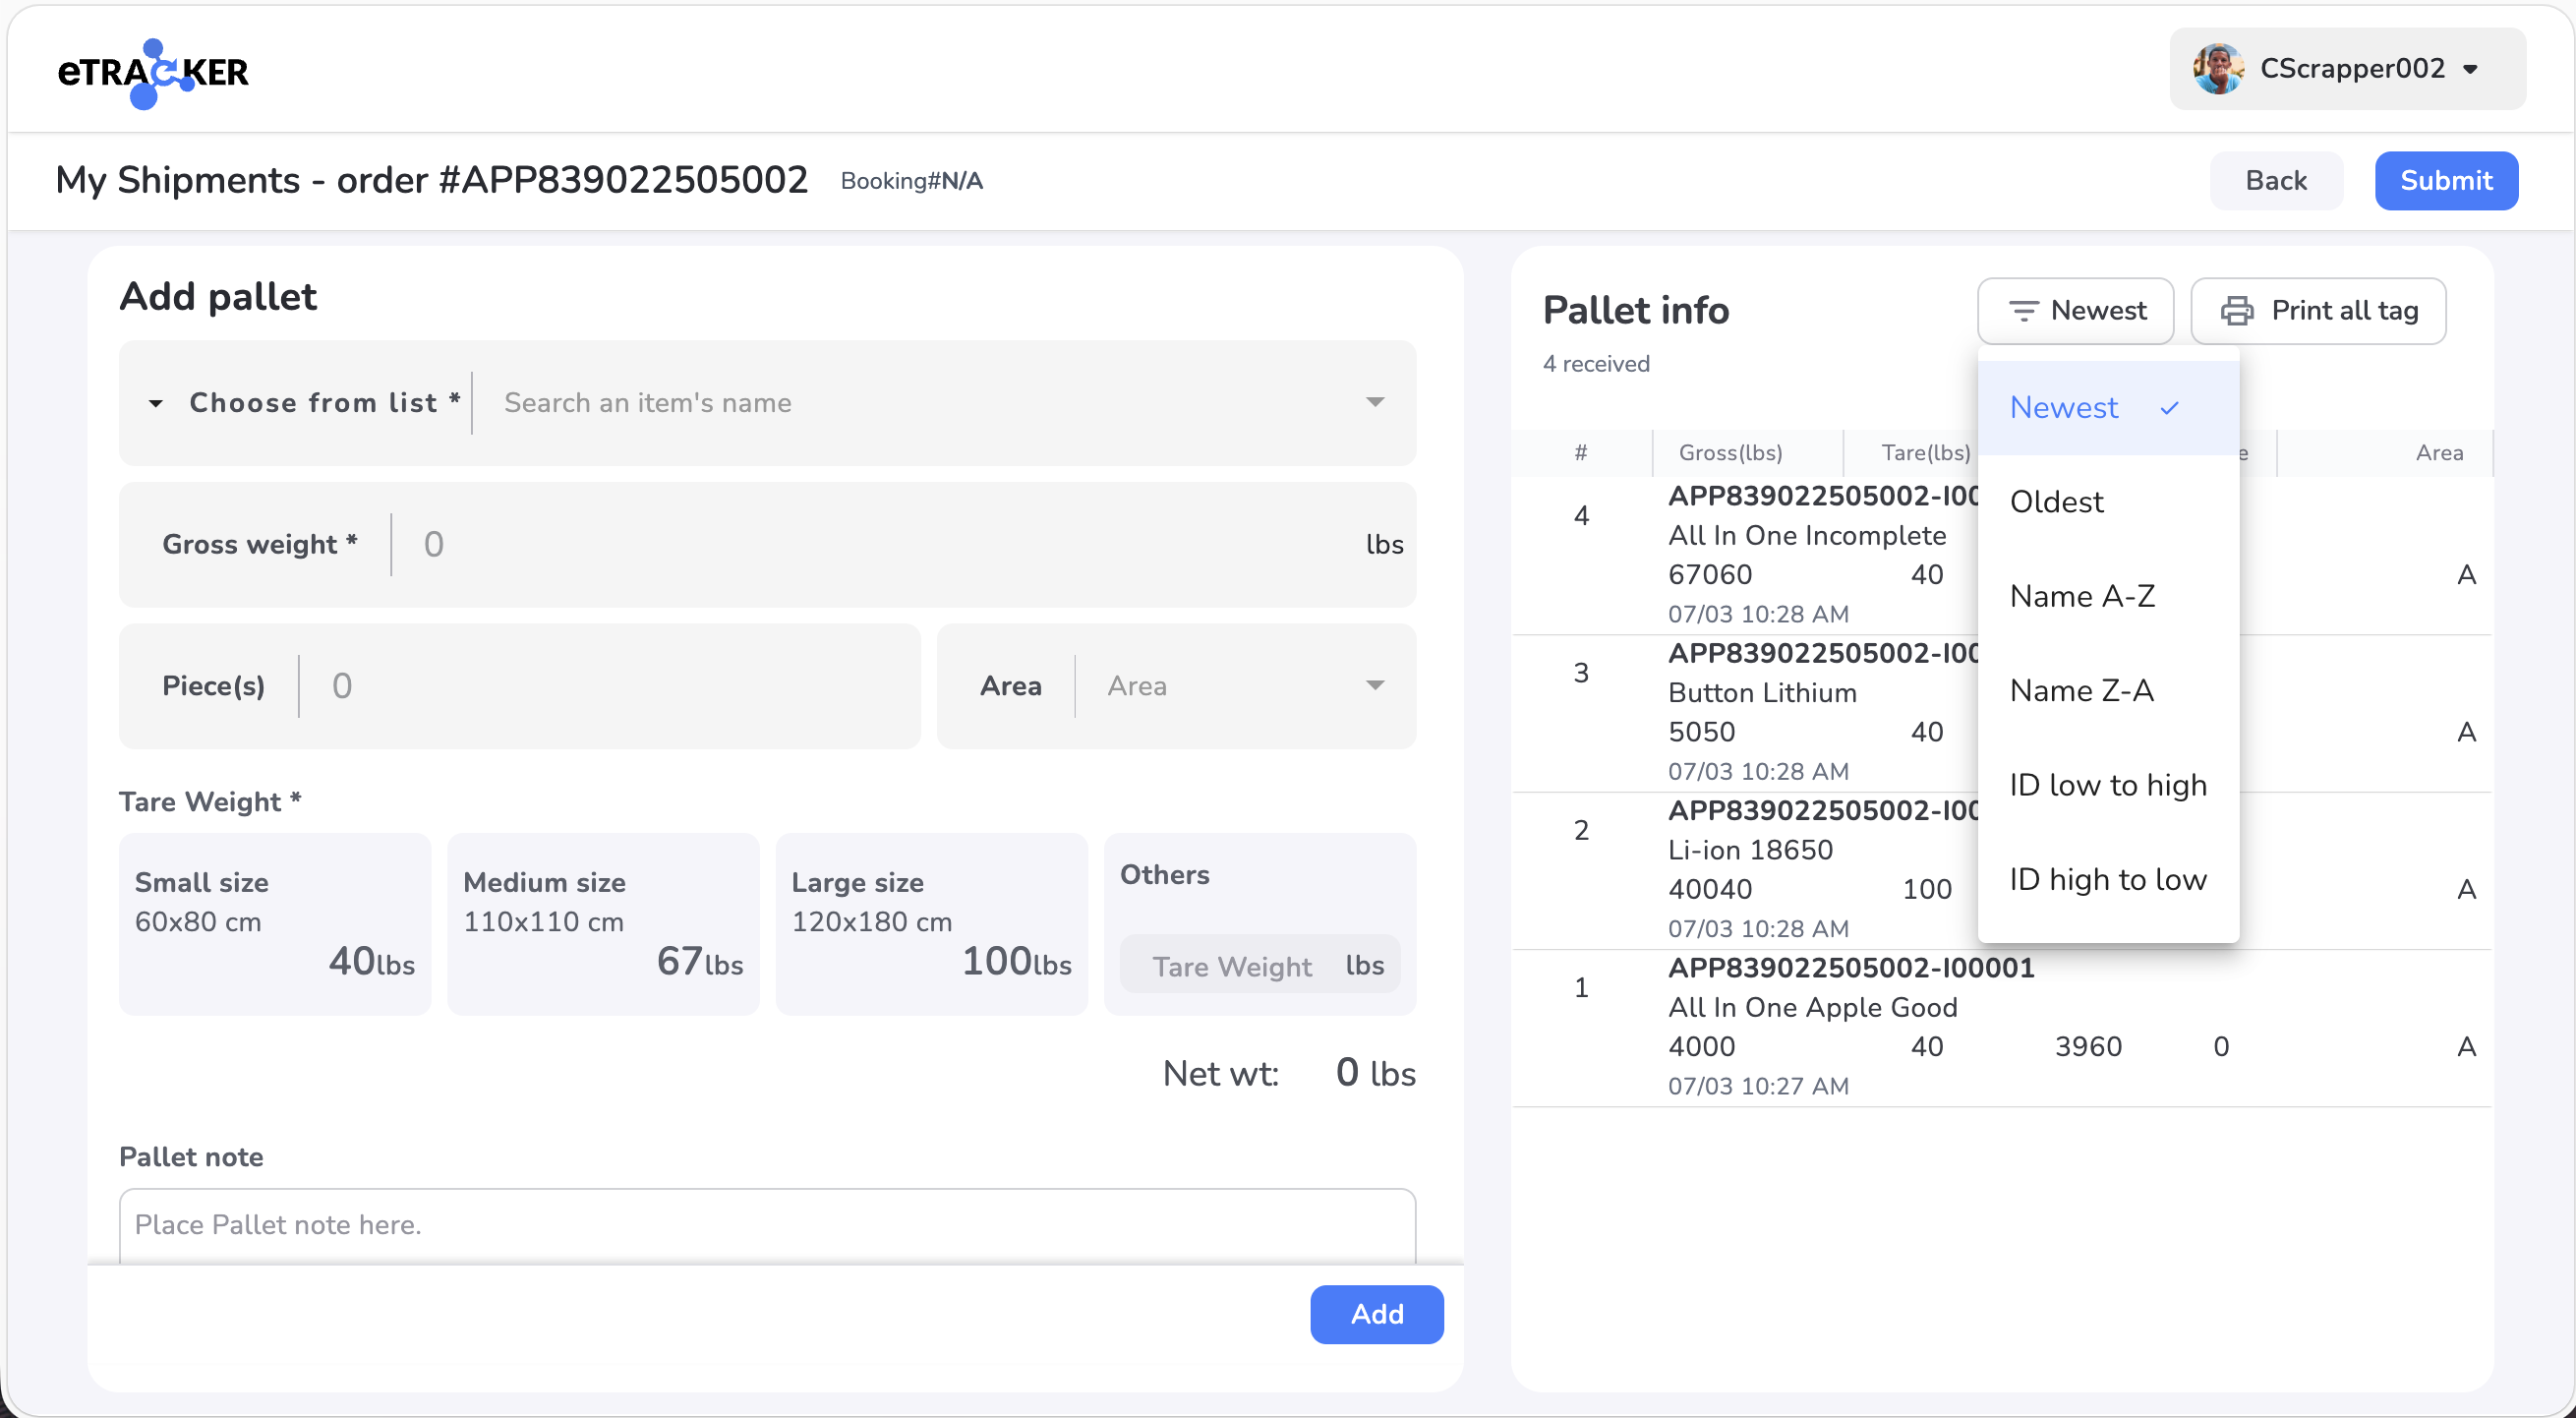
Receiving and classify workers can choose the list order that best matches the task in front of them.
Use the sort menu above the pallet list to change how received records are displayed.
Available options include Newest, Oldest, Name A–Z, Name Z–A, ID low to high, and ID high to low.
The list also shows the number of received records and each record's created time, making it easier to identify the item you need.
Order Correction is only for confirmed errors or omissions — if the original workflow can still fix it, use that instead.
Confirm it’s a data error already on record — not something the normal workflow can still handle.
Check the receiving record, photos, weight record, and pallet data first.
If the original flow can still fix it, use that — Order Correction is only for confirmed errors that need an audit trail.
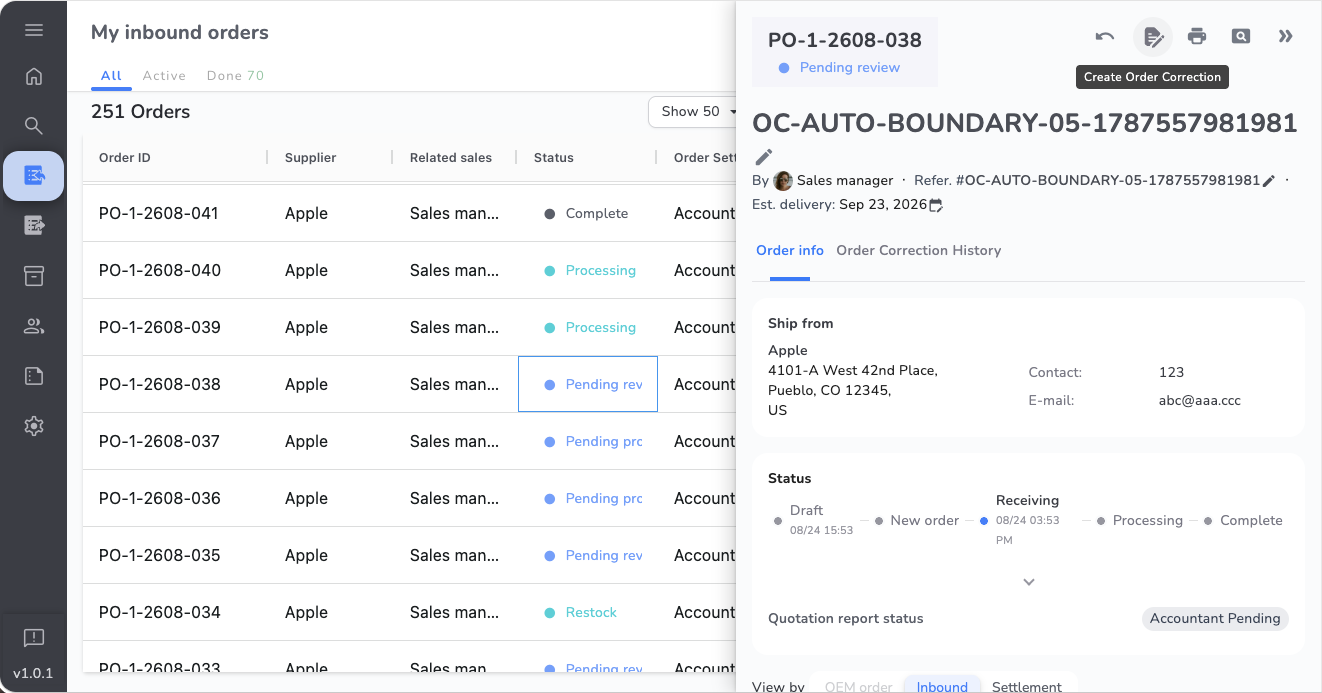
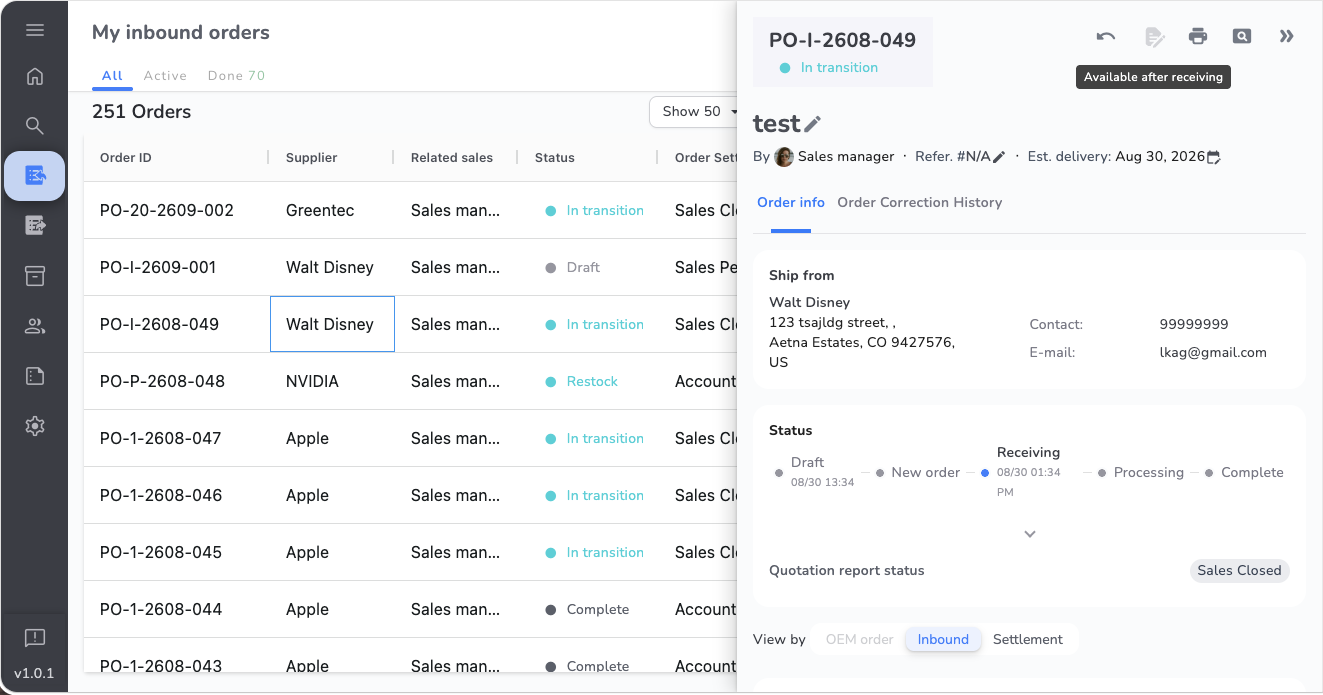
Check the correction's status first, then decide what to do — the Correction type sets what can be changed.
Data correction only is for existing data that's wrong; Late inbound pallet is for a pallet missed during receiving.
Picked the wrong type? Discard the unfinished correction and start a new one.
You can open a new one after Applied or Discarded for a new confirmed error — but repeated corrections shouldn't substitute for fixing the source process.
The correction type describes what kind of problem you are fixing, and it decides which data you are allowed to change. Choose it first — it can’t be switched after you start.
Allowed: add inbound pallet; soft-delete inbound / sorting / processed
Not allowed: change pallet/tare number; change workflow or order status
Allowed: edit existing fields, Customer section, Related sales, add photos
Not allowed: add or delete pallet; add inventory quantity
An open correction is shown in the order list and in the order detail panel, separately from the order’s own status.
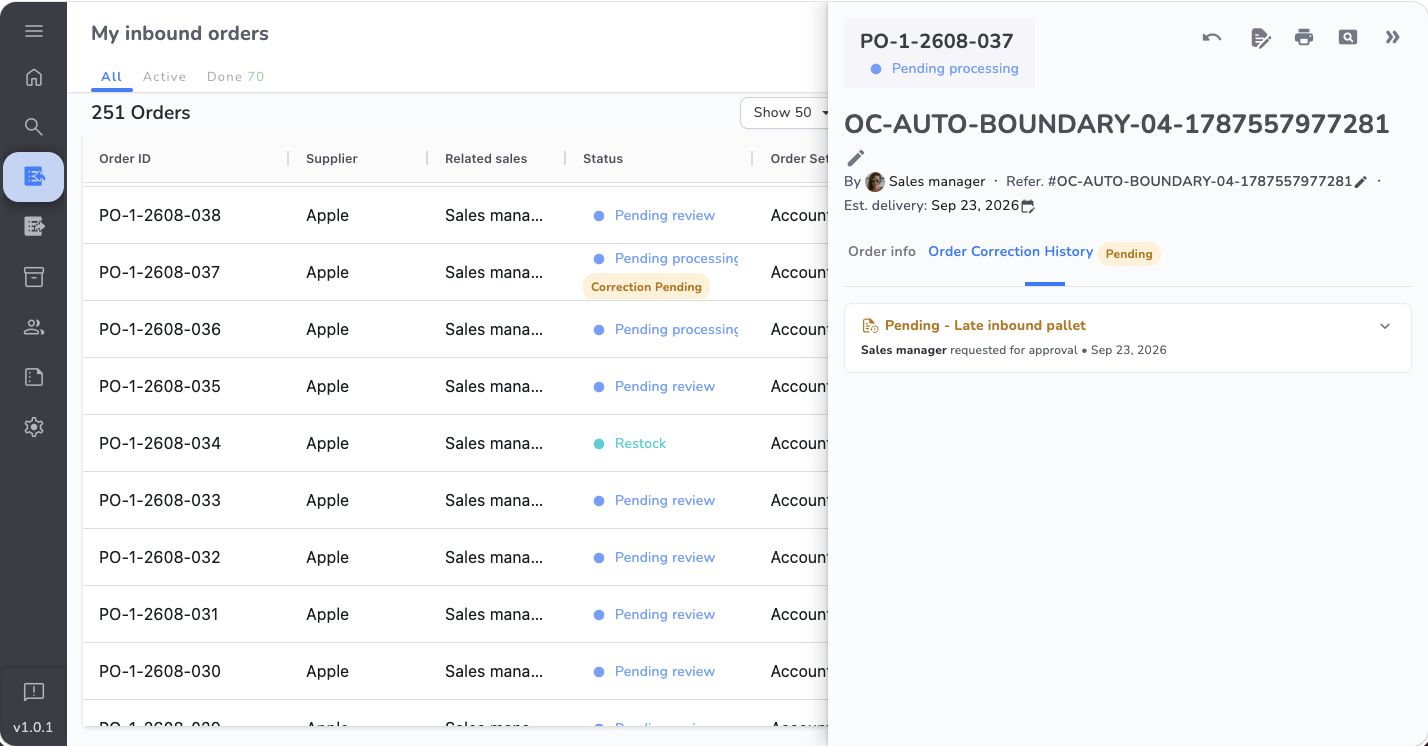
An order with a correction waiting for review shows a Correction Pending tag under its order status.
In the order detail panel, the Order Correction History tab shows a Pending badge while the correction is open.
Each card shows the correction status and type, who requested it, and the date. Expand it to compare Current → Requested.
The order keeps its own status, such as Pending processing. The correction status is shown separately — see OC-02 for what each status means.
Open it from the order detail page, choose the right type, write a traceable Comment, pick a Reviewer, then Submit — only Submit creates the correction.
Click Create Order Correction on the order detail page. The order must be in Receiving with at least one already-received pallet.
Data correction only is for a data error; Late inbound pallet is for a pallet missed during receiving. The type can’t be switched later — if it’s wrong, discard and start again.
Pending review, Restock, and Pending processing each allow a different scope of changes.
Pallet number and Tare number can’t be changed. For the other editing rules, see OC-05.
State which data is wrong, what record or photo it’s based on, and what value it should become. Example: “Received weight was logged as 150 lb; per the scale photo and receiving record, it should be 130 lb. Requesting the Receiving inbound pallet’s Gross weight be updated to 130 lb.”
You can’t Submit without a valid Reviewer selected. Once submitted, the status becomes Awaiting approval and the Reviewer is notified.
Only change what’s necessary each time — don’t mix unrelated edits into one correction. Use Restore before Submit to cancel a deletion mark.
Only fill in Requested values for the fields that actually need correcting — don't touch unrelated fields along the way.
Net weight follows the system's own calculation — it can't be typed in directly.
Existing photos are view-only; a new photo you just added can still be removed before Submit.
A pallet or field marked for deletion only takes effect after Approve and a successful Apply; use Restore to undo the mark before Submit.
The Reviewer compares facts and differences first, then approves, rejects, or the Requester reassigns to someone better suited.
Compare Current → Requested and judge whether the change makes sense given the evidence.
The Comment should clearly state the reason, the evidence it’s based on, and the Requested value.
Confirm the change is within what this order’s current status and Correction type allow.
Consider whether it could affect other pallets, Sorting result, or Processed pallet.
Only the Requester can change the Reviewer. Only while Awaiting approval or Rejected. Changing the Reviewer never changes the Requested data — both the old and new Reviewer are notified.
Each correction has one designated Reviewer. Know who can be chosen, how they find the request, and what only they can do.
Enabled Warehouse Managers and Sales Managers. The Requester is never a candidate — you can’t review your own correction.
The form preselects the first Warehouse Manager by name (A–Z); if there is none, the first Sales Manager. Change it if someone else knows the order better.
Submit sends the Reviewer an in-app notification. Opening it goes to the order’s Order Correction History with the matching card expanded.
Other Managers can’t approve or reject this correction. The Reviewer also needs view access to the original order.
Reject asks for a fix; Discard means it's over. Neither one applies the Requested data.
Rejected never applies the Requested data.
Rejected is still an open correction — you can’t open a second one.
Resubmitting reuses the original correction record.
Discard withdraws the request — Requested data is never applied.
If new errors are found after Applied, you must create a new correction — you can’t edit a completed record.
Reviewer asked for more info or changes; official order data stays unchanged.
Read the Reject comment → fix data or add evidence → Resubmit
Withdraws the request; Requested data is never applied.
The Reviewer should clearly state what’s missing, which field is wrong, or what evidence is needed, so the Requester can act on it directly.
Once Applied, check History for the result, then confirm downstream data yourself — nothing downstream updates automatically.
Awaiting approval, Rejected, and Discarded never write the Requested values.
Check the before/after values, Comment, Requester, Reviewer, timing, and final status.
A Receiving inbound change doesn't automatically update or remove Sorting result or Processed pallet — check those separately.
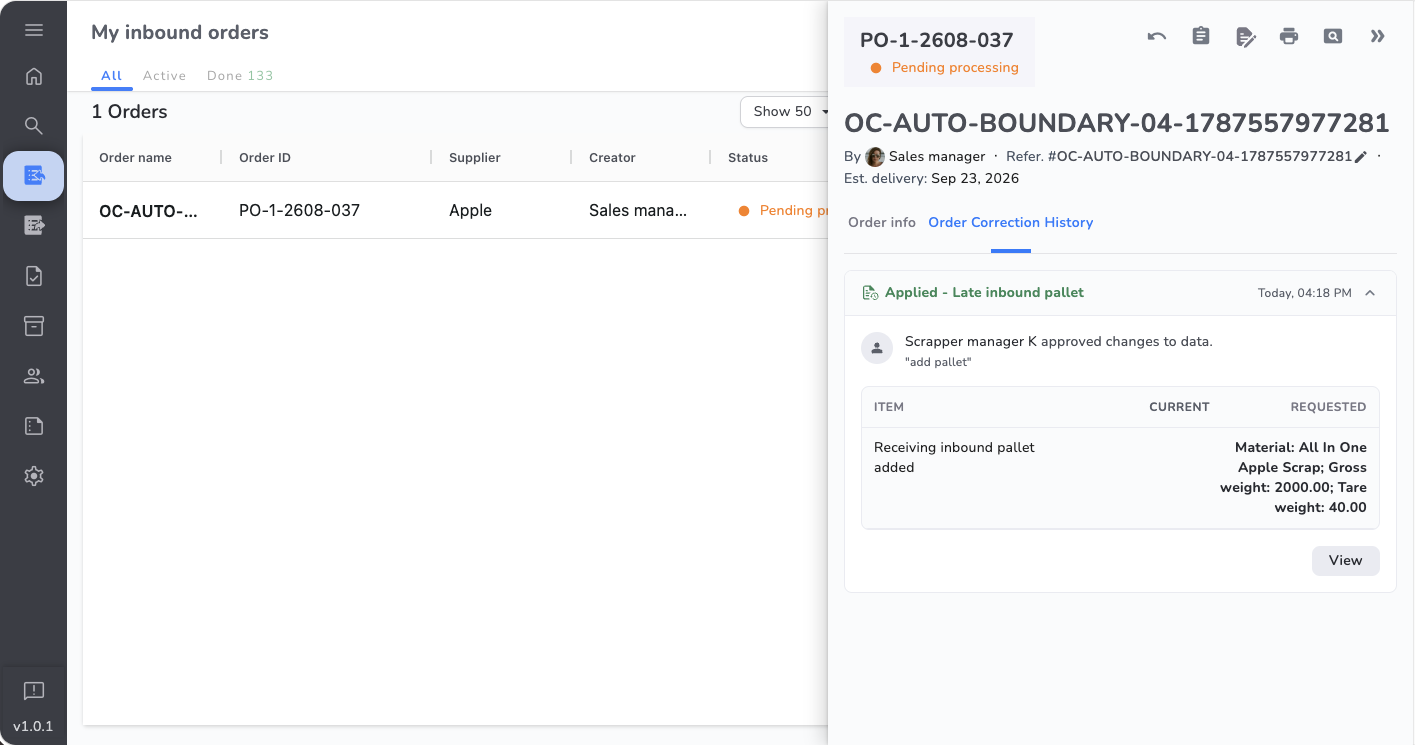
Only an Applied, added-or-modified pallet that already has an official pallet number can be reprinted.
Users with view access to the original order can print.
Awaiting approval, Rejected, and Discarded correctly keep Reprint disabled, since the data isn’t official yet.
Reprint uses the browser’s print function; this release doesn’t record print count or history.
| Can reprint | Can’t reprint |
|---|---|
| Applied | Awaiting approval |
| A new or modified pallet | Rejected |
| That already has an official pallet number | Discarded |
A correction is a controlled-change record, not an ISO compliance certificate — keep the facts, the evidence, who handled it, and the result.
Preserve both Current and Requested so it's clear what changed.
Preserve the Comment and any supporting photos, weight records, or other evidence.
Requester, Reviewer, and the timing of each action should stay traceable in the record.
Record whether it ended Applied, Rejected, or Discarded — don't treat an in-progress state as final.
After Applied, actively confirm Sorting result, Processed pallet, or other affected records.
Already-issued documents, labels, or external records aren't auto-synced by a correction — they follow the company's existing document-control process.
A complete, tamper-evident version history for every Reject/Resubmit cycle.
Baseline protection of official data as of the moment of Submit.
A print-event history log.
Retention period, legal hold, or audit-access policy.
Order Correction helps preserve the change and review context — on its own, it does not mean the organization complies with ISO or other regulatory requirements.